The Entire series can be found on this page.
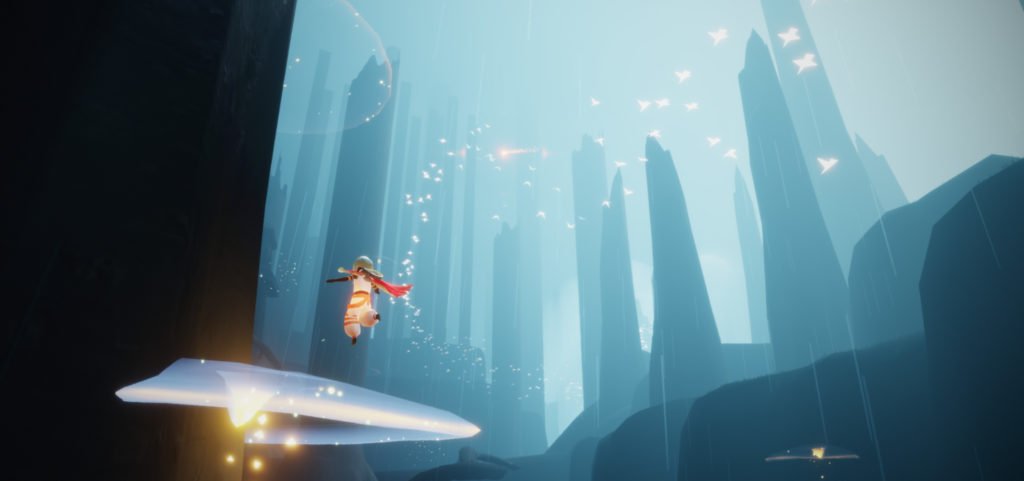
This is the 3rd zone of the game and the first that poses an actual threat to players, especially low “level” new Moth players. Its continuous rain will cause a constant drain on the player’s light level and eventually start causing harm, draining Winged Lights. It’s relatively easy to avoid this by simply finding cover and recharging. Experienced players won’t really find this a threat at all and the zone is one of the most peaceful and relaxing areas of the game in the long term of things. It also probably the one zone players will return to the most. It has a pretty generous amount of Wax scattered throughout as well as Grandma’s table which is the best place in the game to farm wax.

The Clearing
There are two easily missed extra areas right out of the gate from the starting social area, but I’m going to touch on them later as they are intended to be visited during return trips. Also just to get it out of the way, Seasonal Candles all tend to be in the Social Area or one of the three sections of the Clearing.
The first section has no rain, and is where this zone gets it’s name, as it’s a wide open area in the forest. A few notable points here, there is a WL hidden up high in the trees, using the clouds along the edge can be helpful to get up there but it may not be easily possible with a low level of WL to get the altitude needed. This area also is where the Sapling spawns in the Forrest.
After passing through the first gate, there is a little walled of area containing a spirit. It also starts raining here, and the rain does not let up until the end of the Hidden Forrest, aside from a few aside special zones. Something else worth mentioning here, there is a little cave down in the lower section, it contains some light up paintings, but serves no other purpose. It was used in a past season, but no longer contains anything meaningful aside from being a nice little hang out spot.
The rock walled area contains another gate to the third area. This wall can also be flown over. The third area is more clearing space, with a small sort of tree house off to the left hand side. There are a few spirit memories here, though only one is a non seasonal spirit so they won’t be visible until the game has been completed once. Also, this tree house area should not be confused with the Tree House Zone, which is it’s own separate special area, which I’ll touch on later.
The third area contains another gate which leads to the next zone. Just a side note, in my experience, this final gate is super buggy, and if you have enough WL, it’s easier to fly over the gate, then walk back towards the gate, to trigger the zone transition.
Forrest Brook
There’s a lot going on in this area. There are a lot of small tunnels and caves which contains wax and spirits. There are a few WL and Candle nests up high as well. The zone is also full of glowing mushrooms on the sides of trees that will refill your light when you float on top. This can be useful when climbing up high, as even with a limited number of flaps, a player can jump between these glow mushrooms and get up high. Off to the right just after the entrance is a spirit gate that requires all 8 Spirit Memories from the Forrest, it leads to the area with Grandma’s Table, which I will get to later.
This zone also contains the Social Campfire up high on the right hand size of the zone (from the entrance). Mostly, there is a lot to explore here and find, and the best way is to just sort of, fly around, though it’s best done with lots of WL so the rain isn’t as much of a problem.
Boneyard
The third area is frequently known as the Boneyard. It’s pretty large though a lot of the last half is just one big open area. The main path leads down a tree tunnel to the right, which dumps into the wide open area at the end. There is also an alternative path to the left which leads over a little pond with a lot of glowing tree mushrooms. There isn’t a lot down either path that is notable, aside from a spirit memory that tracks down the Tree Tunnel. At the “end” of the mushroom path, up high, is a WL locked high in a cage, but it’s easily reachable from the open space area at the end.
What is notable about this early section is that way high on the right, is another little tree house area. Once again, not to be confused with the Tree House Zone. There are a few spirits up here and a little mini game to race and collect special light objects. It’s actually kind of tricky to get up here even with a lot of WL, because it’s so high up and there isn’t a good place to recharge up in the area. It’s actually better, I find, to just walk and climb, so you have WL available at the top.
There is also a WL hidden in a large open tree up in this area (slight lower and on wards towards the end) that I can never find when I need it.
The open area at the end is pretty straight forward on it’s main math. There are a series of triggers to light up that will build a bridge across the water, then raise a series of jellyfish up that can be used as stepping stones up to the temple. Off to the right is a platform with a cave under it where a lot of wax is located inside some Darkness plants. There is also a secondary entrance to the Grandma Table Area.
The Temple
The Forrest Temple is pretty notable because there are several darkness plants to burn, including a large one (that requires at least two players), so it’s worth going in. It’s also worth viewing the cut scene at the alter because the small pond zone just after the temple has some darkness to burn and an easy to access WL. Moving on to the Valley of Triumph though is optional after doing it once. It’s a fairly long flight between zones, so it’s usually worth just teleporting home and using the portals.
Elevated Clearing
Also known as “The Grandma Table Area”. There is a little size zone here that has a fair amount of Darkness plants and wax, but more notably contains Grandma. Every other hour, from 35 after to 45 after (come a bit early), a friendly Grandma will appear at the large table in the center of this zone and serve up balls of wax every minute or so. There are almost always gatherings of players at this time. Doing this ten minute run is worth 4-6 candles, depending on how many candles you have collected previously. It can be done roughly 1.5 times per day. It’s 1.5 because halfway through the second run, it maxes out on the amount of wax allowed and wax stops appearing (for you only). There are a few other similar events, the Geyser just before and Turtle just after, in Sanctuary Islands being the most notable, but neither is worth white as much Wax.

Time for the event depends on one’s time zone, for myself, in the central time zone, it occurs on the even numbered hours.
The Underground Cavern
From the Elevated Clearing a secret underground cavern can also be accessed. Inside a tree near the “Exit” a two player floor panel can be broken, which drops the player down into a large open cavern. I strongly advise having a lot of WL for this cavern. It’s not a hard zone, but it’s a massive open space cavern so it requires a LOT of flight (this WL Flaps) to get around it easily. Even taking advantage of the various regenerating sources in the cavern. There are 4 WL in this space to gather as well.
The Tree House
This is an interesting side zone related to a previous season. I also would recommend not doing the spirit guide quests unless you have someone to do them with, but it’s worth going for the couple of WL. This is one of the two easily missed zones from the initial flight from the Social Area. About halfway down the cloud tunnel will be some small land “islands” showing. The first one contains a small cave that can be used to access the Tree House.
The zone itself is a giant, multi leveled tree and is a popular hang out spot. There is a Seasonal Guide spirit who gives out multiple activities but every activity requires an increasing number of players. The second needs two players, I believe the third needs 3 players. Etc. It’s worth NOT doing this, because other wise, as is my case, every time you enter a related zone, you get a special cut scene, until you finish the special quest.
Which is annoying.
After doing each of these quests, it unlocks a special exit to each of the zones in the Hidden Forrest.
The Wind Paths
The other easily missed zone, is the Wind Paths. Immediately after leaving the Social Space, there is a hidden entrance high in the clouds that leads here. There is a multi quest giver here as well. All of these quests are done within the Wind Paths, and once completed, it unlocks shortcuts between all of the larger zones (Prairie, Forrest, Valley, Wasteland, Library). Though I am not sure they are really all that short.
Also notable, there are times when the Wind Paths are “bugged” for some reason. From what I gather, the bug is most often related to Seasonal Candles and teleporting home from within the Wind Paths. So mostly just, don’t do that.