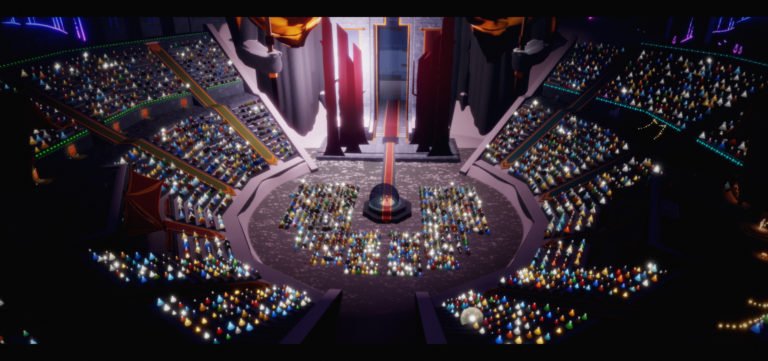
This is the first full regular zone of the game and the second zone overall. It continues a bit of the trend from the Isle of Dawn though in sort of introducing some mechanics of things to the player including spirit doors and multi player doors. There are some of these in the Idle of Dawn of course, but they are way off the main path and not likely to be noticed on a first time visit.
There are some branching paths, but for the sake of candle runs, there is actually a pretty straight forward one way path that only really overlaps one zone, so, I’ll mostly follow that for this little write up.
Unlike the Isle of Dawn, this zone has a Social Area that the player drops into, where outfits can be changed and spirit memory spirits can be accessed once unlocked. The social area is also where the sapling can be found for daily quests and it often contains 1-2 seasonal candle parts.
Butterfly Field
The first zone is often referred to as the Butterfly field. It’s a large open space with a very large rock in the middle and 3 exits. There are a couple of spirit gates, one with a WL, the other just containing some candles. Any remaining Seasonal Candle parts will be in this zone. There are a few candles to be had, the most are in the cave near the end.
On the initial visit most likely you’ll need to just go straight on the Village area, but for candle runs, it’s best to exit to the left side (from the entry area) to the Caves.
Caves Area
What a boring name, but it’s a pretty boring area. There are an ok amount of candles in this area, I find it’s best to start off going across the cloud lake, then up to the right through the small tunnel to the Social Campfire. After collecting a bit from the campfire, head back and down and straight across. There is a spirit door here, though it requires a spirit from the Hidden Forest. If you have one, head through this gate for a spirit memory and some candles. It loops back to the main path.
There are some holes up high, one in the main larger chamber contains a WL, but the rest mostly just lead to out of bounds areas. Along the “exit” tunnel, there is also a second WL up high. Both of these are pretty easy to miss. Occasionally there will be a red shard event in this area as well. Exiting leads to the next zone.
The Villages
I’m not real sure what makes this a village, it has a few little monument things and several spirits in little caves, but otherwise it’s more like a series of islands surrounded by clouds. There are quite a few candles in this zone to collect across the little islands as well as several spirit memories and a few WL. Once all three of the beacons are lit, Rohan will ride to the aide of Gondor. Or well, a bunch of large Mantas will fly in and swoop around. On early trips, the next path is to ride a manta up to the temple, or just fly along the clouds.
If you have at least 6 spirits from The Daylight Prairie there is a better path. On the right most beacon island, there is a door that takes two people to open. Inside this door is a spirit gate locked by 6 spirits. (Technically this is a separate zone) Past this gate, is a room with a platform and a lock that requires a whopping 8 players to unlock it. This may seem daunting but just waiting for a few minutes, usually will cause additional players to spawn in and the platform can be raised. There are a large amount of candles at the top of this platform.
The platform is flanked by some large trees, one contains a WL. Another has yet ANOTHER multi person puzzle. if 7 people gather and hold a pose for a few minutes, it spawns a small dog that players and play with and ride on. Sadly, you don’t actually get the dog to keep. But it’s neat and one of the little hidden things in the game.
Heading out from here through the portal leads back to the Villages, except it exits up by the Temple entrance. Something notable, sometimes there is a red shard event up here. There are also a couple of WL up on top of the temple that are easy to miss.
The Temple
Inside the temple is pretty bland. There are a few candles to light for wax, and of course the Alter. For straight moving on, the Temple exit leads directly into the Social Area of the Hidden Forest. But for Candle runs, it’s best to turn and exit the temple.
Fly back across the villages to the left side little platform up in the clouds and heads to the next zone.
The Bird Nest
This zone is also accessible from The Butterfly Field, when exiting through the spirit gate on the right hand side. If you’re just going straight to Sanctuary Islands and not doing a candle run.
There Bird Nest both has a lot going on and almost nothing going on. When the Green Light comes up on Daily quests, it’s in this zone. There are a few places that Red Shard Events happen here. There are some wax points, but none of them are particularly large and flying around is tedious so it’s not really worth going for them. Most of the time it’s easiest to just pass through down through a cloud tunnel to the left from the Village, or straight across from the Butterfly Field, to the Sanctuary Island.
Sanctuary Island
Unlike the Bird Nest, there is a lot going on here, and it’s one of the more frequent zones to visit for it. There is a lot of wax to be had from burning darkness to lighting candle cakes to visiting the Geyser or Turtle events. Both happen every other hour (even hours in Central Time Zone). I believe Geyser is around 20 after and Turtle is around 50 after. With the Grandma Table in the Hidden Forest in between.
There is also a multi quest giving spirit here, which will have to do tasks around the sanctuary island. Plus several regular spirits.
It’s also, in general, one of the prettiest zones to just hang out in.
Anyway, there also isn’t an easy way out, so it’s best to just teleport home when done.
When you first drop into the game, you start on the Isle of Dawn. It’s actually a deceivingly complex zone, that designed in a way that hides this fact. Part of what helps this is that on the initial visit, it very much hand holds you through the trip. It pushes you through the opening cave, then later encourages you to go and collect that first Winged Light upgrade, and then to fly up the little cliff, and from there there are obvious cues in the form of two obvious, large hills, and a giant castle up in the sky.
The first trip funnels you right up to that castle. And given the level of availability and WL, that’s about the only option for where to go. There also isn’t a lot of incentive to return here much. It never has daily quest content, there aren’t a ton of wax spots, there isn’t a lot of seasonal content here. Why bother?
At some point, you go back, and realize, there are a lot of little extra places to go here.
The Desert Area
I am not sure that’s the official name, but that’s essentially what it is. MOST of the Isle of Dawn is this huge empty desert. It has a couple of large hills and leads up to the Temple. But there is quite a bit more here. The large rock at the opening that the game tunnels you through, can be climbed. Off tot he left, in a hard to see area is a tunnel that goes very deep and contains a seasonal spirit. There is a little cave and mountain area hidden among the clouds high and to the right of the desert as well.
There is also a tunnel through the clouds off to the right of the main Temple Path that leads to the Trials.
But on the main path, to the Temple.
The Temple
Like every other zone, there is an Elder Temple and alter at the end of The Isle of Dawn. Any collected spirit memories will show up here and give you options to unlock rewards. There is a cave hidden on the left hand side behind a spirit gate and a cloud tunnel going off on the left hand side.
The Hill
I mentioned the hill off to the left of the desert. There isn’t a lot there, but it’s hardish to see since it’s so high up. There is a Winged Light up there and a Seasonal Spirit that requires some puzzling to retrieve. I believe it also requires multiple people to do the puzzles, which is a pain.
The Trials
This is the real hidden meat of this zone. Through a cloud tunnel to the right of the Temple path is the entrance to the Trials. There are 4 of them, and they must be done in order the first time. They are actually pretty difficult, especially the last one, the Trial of Fire, which basically requires a map.
Each Trial also has a seasonal spirit available, once you have completed Eden once.
All of the trials remove your cape and ability to fly, though dying during the trial just resets to a checkpoint.
The Trial of Water
The first trial is Water. It’s a series of small islands, some of which must be raised by activating small alters, in the middle of an ice island. The island has water which flows up and down, covering most of the island’s surface (hence small islands, on a large island). Touching the water is instand “death”. This trial is a lot of patience waiting for the timing of the water flow and discerning the correct path. Completing the trial rewards one WL and gives access to the second trial.
The Trial of Earth
Honestly this feels like the easiest of the four trials. It’s basically a big mase with a bit of platforming. There isn’t a lot of risk most of the time, it’s just being able to keep track of where and when to go back to a door that was just opened.
Like all the trials, completion yields a WL and unlocks the next trial.
Trial of Wind
This one can be tedious. It’s a LOT of platforming, over a pit, with moving platforms, and often little wind based momentum pushing jump platforms, that are extremely flakey.
Trial of Fire
Definitely the hardest trial. Find a map online. Trust me, you want a map, and you will STILL die a lot and get lost. All of the online maps suck.
The trial itself takes place in complete darkness. Don’t bother raising your phone brightness or anything, it’s black as black can get. Stepping into the darkness means death within around ten seconds. The trial consists of lighting candles along the path and following the path. Most of the time, you can’t see the next candle, so it’s a literal shot in the dark. During the 2nd stage there are these large worm things that patrol around and will kill you, on stage 3, there are even more of them. Did I mention it’s black as black, and the worms are also black? You can sometimes see their eyes, but many times you only hear them coming.
It’s rough, and annoying, and kind of awful. I think in theory you can Deep call as a sort of sonar, but it doesn’t really help at all.
All that said, I do kind of enjoy the challenge of the trials, but I am not running out to do them over and over.
I’ve been playing this game Sky: Children of the Light for a while, and like many games I play regularly, I’ve felt compelled to sort of, write up my experiences. Now, I’m calling this a “Guide” but it’s not really. I’m not going to detail where to find everything exactly, “fly here, do this, hop 5 times to the right”, more, just a free flow of thoughts on the various parts of the game and things I’ve noticed or learned along the way.
I don’t promise to be an expert or that I’ll turn anyone into an expert, I just want to write about my experiences with this game. It’s going to be a series of articles, one for each of the 7 zones, plus this introductory article. For this introduction, I wanted to just run off some of the terminology and some general tips to get the best experience with the game.
What is Sky: Children of the Light (CotL)
The plot of the game is not super complicated, though there is some vague lore going on for anyone really paying attention to all the little clues and spirit stories. I’m not super into the lore part of the game, more the visuals and relaxing gameplay loop. You’re a Skychild, you explore the world collecting wax from candles and reliving the memories of lost spirits. You also collect these sort of lost souls called Winged Lights, which make you stronger. Light is essentially your health. Lose all your light you go dark, continue to take damage, you lose Winged Lights, lose all your WLs and you die.
Don’t worry though, after death, you are simply reborn at the start of the game.
There is also a bunch of cosmetics and an alright music system. It’s also all online so it is a very social game, while also being extremely anti social. You will see lots of other players, but unless you mutually light each other, they appear darkened. You may then become friends with them if you’d like. You can only chat briefly at special benches, or if you have unlocked the chat feature in your friend tree.
Being a mobile game, it has some micro transaction elements, mostly cosmetics. The are also seasons and season passes for limited time cosmetics. There is also plenty to unlock for free though. Everything costs in game currencies, of which there are five currencies.
Candles – The main common currency, collected in game by lighting candles and collecting Wax. It’s a sliding scale each day, the more wax you collect, the more it takes to forge a candle, but if you collect every piece of way, you can forge around 20-21 candles. I don’t recommend doing this. It’s incredibly tedious to do and will take 3-4 hours. You can also simply buy candles, if that’s your thing.
Hearts – A secondary social currency of sorts. You get heart either by being gifted them from friends (at a cost of 3 candles), through the daily lighting from friends (60 lights = 1 heart), from people liking a message candle you placed, or from some spirits, usually at the cost of 3 candles. You cannot buy hearts, and as such they are the hardest currency to get.
Seasonal Candles – When there is a season going on, you can collect Seasonal Candles, 5 a day for free, 6 for pass holders. They can be used to unlock special Seasonal Only items from Season only Spirits. After the season, remaining Seasonal Candles convert into regular candles 1:1
Seasonal Hearts – Once a seasonal spirit is fully unlocked, a seasonal heart can be gotten. These are used to unlock the seasonal “Ultimate Gifts”. Like Seasonal Candles, unused ones convert to regular hearts, though there are only like, 4 available all season, so it’s not an effective way to farm Hearts.
Ascended Candles – These are used primarily to unlock Ascended Windged Lights. You can get them from Red Shard Events and at the end of the game. I’m not going to go into much more details here for spoilers, but will cover them in the final part of this guide when discussing Eden and the end.
Spirits
These are characters you find in the game that are used to unlock progress, cosmetics, and emotes. Aside from collecting wax from candles, this is the core gameplay and all of the lore comes from the spirits. They are found throughout the various areas. You light them with your candle and then relive their memories through several different methods. Once you relive the memory, you will gain the level 1 version of an emote, which is the primary way Sky Children express themselves to each other. They come in two main flavors, regular and seasonal.
The memories are told through static posted little snapshots of a story and there is a lot of detail to be found in them for those who really observe and break them down. Once a regular spirit is unlocked, the player must meet them again at the Temple at the end of the zone, and then they become available in the constellation of that zone, to unlock further cosmetic items and emotes and spells.
Seasonal Spirits can’t be revisited until they return as a Traveling Spirit. Every other week, a Traveling Spirit shows up in the Home zone and their cosmetics can be purchased. Without going into a lot of spoilery detail, it’s general worth at least trying to unlock their Ascended Wing Light when they come, it’s the stage just before the first clouded part of the tree. This will usually require around 10 candles to reach and 2-3 ascended candles to unlock. I only mention this because they sort of return at random, and there are a lot of them, and this is the only time they are available to unlock for anything. The cosmetics may or may not be interesting, but the Ascended WL is always useful.
Something notable, except the Skater in the Valley, which is bugged, spirits will glow when they have been uncollected, or when they are part of the daily quest requirement.
Anyway, the actual activity varies. A few have unique, complex mini games, but most fall into a few categories.
Collect the Memories – They show up, you go to the spirit, for each stage, until you get them all.
Escort – These can be extremely tedious, and some of the hardest spirits are escort types. The basic mechanic is the same as regular collection, except you must also slowly escort a glowing light to each of the stages.
Collect the Items – A few spirits will spawn a large number of glowing shards that must be collected in a limited amount of time.
The Skater – The Skater quest line in the Valley of Triumph is a series of collection type quests, but you must often do some sort of race as well. I also want to mention this quest giver because it’s bugged and always glows. So it’s easy to think it’s not been done yet. There are something like 4 or 5 instances of the Skater in different zones.
General Tips
Let’s start with some tips. I’ll probably slip and use some terms here that are “game terms” but I’ll try to define them some in the next section.
For your first run through the game, don’t stress things. Lust, enjoy the journey. Make a note of that area you can’t get to, maybe get back to it. Don’t worry about maximizing your candles or getting everything in one go. Until you finish the Vault and get to the entrance of Eden.
That said, don’t do Eden your first trip. Avoiding spoilers for now, but you’ll want to maximize how many Winged Lights you have before entering. Also, Eden is rough. Super rough, it will take a lot of time to pass through. Like 95% of this game is 15/10 on the chill level. Even is a -20. You spend the whole game exploring this beautiful peaceful land, and top it off by terror at every turn and a constant rock storm. It’s worth going, just, collect up like 100 WL or so first, and have a block fo time to do it in.
Collect the map stones. The little stones with 4 candles in front that you kneel at. Having these is super helpful for finding WL, since the WL show up on the map.
Once you start grinding candles a bit, make sure to use things like Grandma’s Table (Discussed in the Hidden Forest) or Geyser (in the Daylight Prairie).
You will constantly discover new and neat stuff and that is the point. I’ve been playing this game for around 6 months, I’ve gone through Eden several times, I have collected all the spirits, and yet, I still occasionally stumble upon some neat new stuff.
Friends are mostly good. You might get friended by random people. They are good to have for daily light ups, but you don’t have to talk to them or hang out with them. Unfortunately the game has no “unfriend” mechanic so you have to just block people to unfriend them.
Eventually you will get some cosmetics. Being a Moth is fun, but eventually you’re probably going to want to fancy up. Most likely by getting some sort of hair or a new cape, as these are the most obviously visible.
Do the daily quests. There is a stone in the Home area that gives daily quests. They are usually easy and easy extra candles. It’s not required, but I wish I had known about it sooner.
You can knock over crabs with a deep call. I don’t think this is ever explained in game, but if you deep call (touch hold on yourself then release), you can knock over crabs. Then you can carry them around and torture them.
There is no real point to carrying crabs around.
Krill are scary. Sometimes called Shrimps, officially I think they are Dark Dragons. They rely on line of sight though, so if you get spotted, put a wall between you and the eye. You can’t out run them and they WILL take Winged Lights.
During the first trip through the game, you cannot see Seasonal Spirits unless they are the current Season Spirits, or they are the current Traveling Spirit. Once you finish the game once, all of these spirits become visible and available.
Terminology
Some terms I’ll probably reference in these write ups. Most are official, at least for the community, some in the game itself.
Moth – A moth is a new or inexperienced player. They are brown and kind of look like moths, and they frequently run to the light because they usually have few cape slats.
Cape Flaps – Sometimes just Slats. Basically, how many “flaps” of flight you can get. It’s been a while, I think you start with 1 but get to 3 pretty quickly. You can get up to I think 12, at 200+ Winged Lights.
Winged Lights – Also called Wing Lights, often abbreviated WL. These are the little flowing child souls you collect. Collecting them upgrades your cape, but you need an ever increasing number to get more slats.
Spells – These are special items you collect that do special things like make you glow or temporarily wear a cosmetic ot grow and shrink in size. I don’t personally use them a lot so I won’t talk about them much, if at all. There is one that shields you from Krill temporarily though, which is useful.
Krill – As mentioned above, Krill at the giant black one eyed monsters, they look like Shrimps and are also called Dark Dragons. They appear only in the Wasteland zone and in Eden, the final zone. If they see you, the light turns red, and you will need to hide because when they strike a few seconds later, you WILL lose 3-4 Winged Lights. Recollecting WL is a pain for a variety or reason I’ll probably touch on later.
Crabs – The only other real “threat” besides Krill, but these little guys are not anywhere near the threat level. They will charge at you if you get close, you can deep call to knock them over. There is a more dangerous variant during Red shard Events that are covered in shards that can’t be knocked over and will be attracted towards calls.
Call/Deep Call – On consoles it’s probably a button press, but calling is the main way Sky Children communicate. It just makes a little noise and sends out a small pulse of light. Holding and releasing does a Deep Call that will be more obvious and knock over crabs.
Red Shard Events – I keep mentioning this so it’s worth actually explaining. Somewhat randomly, there will be a darkness eruption in a zone. You can tell which zone because it will have red shards on it’s portal. I believe it’s also never the Daily zone or the Daily Bonus Candle zone. During these events, somewhere in the zone, there will be large red shards and red Darkness plants to burn. Burning enough will unlock a light collecting mini game, then award Ascended Candles. The type of Shard Eruption varies in difficulty. Some are super easy, with just regular crabs. Other will have swirling red rocks and shard crabs and take a long time to “complete”. Afterwards there is also a portal that can be entered, each different memory in these portals has a WL to collect somewhere.
Emotes – Aside from cosmetics, the main collectible is the various emotes. Every single spirit gives an emote of some kind, usually related to their little story. My chief complaint is there is NO way to organize these things, and once you get to the point I am at, you have a WHOLE LOT of them. It would be nice to have categories to drop them in to make them more quickly accessible.
Bowing – Bowing is definitely however the most used emote. It’s not required, but it’s essentially become the community agreed upon formality. Especially after lighting candles. You bow. You help someone or be helped, you bow. It’s not required, people probably won’t think much if you don’t, but it’s just, polite.
I came up with a good “post series” name the other day but like a dumb-ass, I didn’t write it down anywhere so I’ve forgotten it. Let this be a lesson to the younger folks out there, you can’t rely on your memory forever, it eventually becomes filled with nonsense like the names of Mario Brothers monsters from 40 years ago.
I use all sorts of reminder notifications and note taking methods in my daily life, but that sort of topic is much more apt for Blogging Intensifies than here. Here, I want to just talk about video games, sometimes. I keep swearing that I write up one of these since fucking January, but apparently not, so here I am. Just ANOTHER thing with becoming a forgetful old man. I guess that’s part of why I like to blog about this sort of thing as well. Because sometimes I forget what I already played 10 years ago.
Wario Land 2
I really did sort of, break the experience playing this series backwards. Wario Land 2 has a lot of elements that showed up in it’s sequel, Wario Land 3. Though a lot less of what was in Wario Land 1, which honestly, feels a lot more like it’s a sequel to Super Mario Land 2 than anything else. Now, I may have been completely missing something here, for example, I found the Select button isn’t mapped right on my Retroid so that results in some oddness, but Wario Land 2, does not seem to have any sort of Overworld Map. You just travel through, level by level. Which is kind of weird because it actually needs the ability to replay levels more than any other title in this series. Each level has at least 2 mini game things that when you fail them, you fail, and that’s it. You’re not completing those bonus items now buddy.
It’s weird, and I am pretty sure I am just missing something somewhere. It’s not a big deal, I really was not going for completion, just finishing the game and beating the final boss.
At this point, I am inclined to say Wario Land 3 is the best title in the series.
Castlevania Adventure Rebirth
I’ve played all or close to all of the “Symphony of the Night” style later Castlevania Games. Not so much the earlier titles. I actually really hate the earlier “standard levels” titles. Primarily because they are all extremely difficult and full of cheap shots.
Fortunately, I can use save states in emulation, which removes that headache.
Castlevania Adventure Rebirth is part of a small sort of series of games by Konami where they remastered some of their older games for the WiiWare line up. I have tried to also play the Blaster Master Rebirth game but it gets hung up on the controls as well. Emulating Wii titles has been really dodgy.
On the game itself, it’s actually pretty neat, though there is a lot of kind of weird choices and puzzles. There are some branching paths as well that I’m not sure were int he original Game Boy version of Castlevania Adventure game, I suspect not. I enjoyed this game, though would have enjoyed it less without save states to keep me going during the tougher parts.
Side note, the resolution for this game is atrocious. I have to assume it’s a Wii thing, because the screen shots from others that I saw online, are just as awful.
Super Castlevania IV
I hate the name of this game, because it just breaks any sort of sorting. It’s just Castlevania IV as far as I care, though I think it’s technically like the 7th or 8th Castlevania title.
This is one I’ve been kind of wanting to get to for a while, but just, never did. The only real thing I remember about it’s release is that it was one of the titles that Nintendo used to really push the whole “Mode 7” thing on the SNES and it had this crazy amazing (at the time time) whip mechanic.
Specifically, the way you could hold out the whip and flip it around with the controller, and use it to swing.
The game itself also really comes off as a bit of an advertisement for “Mode 7”. There is a (single) rotating room (OMG THE ROOM IS ROTATING!), and a single hallway through a tunnel where the background rotates “around” you (also pretty new at the time). Also the giant swinging Chandeliers, which I assume must have been super taxing on the hardware because the background int hat screen is completely blank.
Super Star Trek
It’s worth mentioning this little classic gem. I played two modern remakes of it, both I think by the same person, but it’s an old school BASIC game, originally run as text only. It appeared in the book BASIC Computer Programs, which I actually have or had a copy of somewhere. I always wanted to type it up and try it, but never did, thankfully, others have, so it’s available in the original format, or some nice updated graphic versions.
The premise is simple, you have so many days (turns) to defeat Klingons throughout the area. You can scan the nearby sectors, warp around, then in combat, fire phasers or torpedoes. You also need to manage the ships’ energy and damage. It’s quite easy to die unexpectedly actually. Space is a dangerous place.
It’s really crazy just how compelling this fairly simple gameplay loop is. It does feel like being a Starfleet Ship Captain, minus the parts that are not shooting things. It’s all very elegantly complex while still being simple enough to easily get. It’s a really good game design.
The next part of my reverse adventure through the Wario Land Franchise, is Wario Land 3. I decided I had enough to say about this game that it kind of deserved it’s own post all it’s own. I’ve finished the game, though I did not (yet) collect all of the 100 treasures. I have no idea what Wario Land 2 is like, maybe that game is similar in nature to this one, though I will say, this gives me a bit of new perspective on Wario Land 4 which I’ll touch on a bit as well.
An Exercise in Insanity
There really feels like there is some sort of weird META concept going on here with Wario being kind of crazy and greedy more than evil. As the saying goes, Insanity is doing the same thing over and over and expecting a different result. And this game is all about doing the same things, over and over and over.
The basic concept here, there are 25 levels, each with 4 treasures of different colors in each stage. The catch here is, you can’t collect more than one treasure in one run. It’s impossible, collecting a treasure ends the level. It’s also impossible because you usually can’t even reach any more than one new treasure each trip. Each treasure you collect, will alter a level in some way that either opens a new level, or allows access to a new area in an old level.
So essentially, you get to play each level at least 4 times. Granted, there will be different sections depending on how much you have unlocked, but the starting areas are always the same, and they are sometimes extremely tedious, which I’ll get to next. It’s a neat idea in concept, I actually kind of like this aspect of it.
The real annoyance I have is that this “repetition” aspect plays out in the level design itself. The game has no lives, Wario literally cannot die. There isn’t even a timer. You could drop Wario into a pit or monsters and lava and leave the game just running and it would go forever with no consequences. A private hell for a digital character, if you want to be a weird psycho.
That said, there are in some ways “lives” in that the game makes liberal use of transformative traps that often pull your character back tot he start of whatever exercise you’re working your way through. Sometimes back to the start of the level. It’s effectively, the same as “dying” in a normal game. This isn’t even a real problem, it’s kind of a unique take on the idea of dying.
The problem is that almost everything is essentially a “1 hit KO” when it comes to these. There is no “Small Wario” or even a “jiggle the controller and escape”. You get hit, you light on fire, or turn into yarn, or become a sludge zombie, and you end up back at the start of the level when you become normal. Since you don’t “die”, the game seems to have taken this as a signal that, “you can just fake die ALL the time.” There are a LOT of places that feel intentionally designed to be “cheap shots”, that feel like the designers justified this as “well, you didn’t die”. In any other situation where you are draining lives, it would become infuriatingly impossible to pass some of these areas without running out of lives.
This just leads to the already built in repetition of the treasure gimmick feeling much much worse. Because doing each level 4 times, becomes essentially doing many levels, 20 or 30 times. Because some zombie popped up on top of you and now you’ve fallen through the floor all the way down, or you got caught on fire and now you’ve fallen off the screen back to the start area.
Too Ambitious
I had an issue with the configurations on my Retroid so the select button wasn’t working, which made for an interesting time with a few features that I thought were missing but ended up not being missing. Part of the crux of that issue was it felt like the game was just, limited by the capabilities of the Game Boy. This game is a Game Boy Color game, and I always forget that the GBC and the GB were just, a D-pad and 2 buttons. No L or R, no 4 button control pad. Just 2 buttons.
I stand by the idea of this game being too ambitious. Wario Land 4 almost goes to show that, not because of improved graphics, but just the improved controls and how much more solid the controls feel. Going into Wario Land 1 after this, I can appreciate how much cleaner this game is that WL1, but it’s not nearly as clean as the Game Boy Advanced Wario land 4 in it’s polish. It definitely feels like it’s just, really pushing things right up to the edge.
The levels are pretty small, but feel large, the puzzles are clever for the most part, aside from the artificial difficulty of constant cheap shots. It’s also fairly long, or at least it feels that way, but even if I could play through things perfectly, it still feels pretty long. The repeat visits to the evolving levels on it’s own is a neat and interesting gimmick as well. Though once again, too ambitious. The game really could use some more obvious sort of visual indicator on which levels need to be revisited next and which still have what color treasures in them.
The Golf Game
Call it PTSD, but I completely forgot about the bull shit golf mini game until I went to dig out screen shots for this post.
Holy Shit this game is bad. It’s a pretty standard 2D Golf game, you press a trigger to start, trigger to pick power, push a trigger to select accuracy. And it’s REQUIRED. A lot of times the mini games, which I generally dislike, are optional. Which is great. I played like one mini game entirely through Wario Land 4. I can just skip it.
This is not an option in Wario Land 3. Several of the puzzles amount to, “Find the golf game and beat it to open a door.” And the game itself is not fun at all. The levels are random, how much power affects things feels random. The PAR needed always feels like 1-2 shots too low to be even remotely fair.
And it costs coins to play. The screen shot shows 10 coins but the more you play it, the more it costs. By the end of the game it costs 50 coins. You could easily run out of coins and then have to go farm them just to proceed. And coins serve ZERO other purpose in this game besides playing this shitty Golf mini game.
There is even a more complex version of this you can unlock by getting all the treasures, which does NOTHING for the story of gameplay. It’s optional. But it’s clear that some dev made this golf game as a pet project and just REALLY wanted it out there to be played.
Wario Land 4
It’s really interesting to me how much Wario Land 4, feels like an evolution of a lot of what was shown here in Wario Land 3. It’s also almost, a serious dumbing down of those concepts, and I’m not entirely sure if that’s good or bad. The main thing is the evolution of Wario himself. At the start of Wario Land 3, your abilities are pretty limited, and match more to previous games. Throughout WL3 you gain a lot of new skills, and a lot are skills you just sort of have in Wario Land 4. It’s not 100%, but it’s still kind of interesting that there is a bit of continuity there.
Though somewhere between WL3 and WL4, Wario lost his invincibility skill. So I guess there were some sort of drawbacks in there. The level design in Wario Land 4 also feels like it’s sort of mimicking the revisiting gimmick of Wario Land 3, but instead of revisiting, you just, have to pay attention and catch everything in one trip. This actually makes WL4 feel incredibly short next to WL3.